
As a SUNY Cobleskill Wildlife Management major, the majority of my classes are very hands on. Our professor’s strive to prepare us “for the field” and the goal is to be “job ready” when we graduate. I’m currently enrolled in Dr. Losito’s Ornithology course. Ornithology: the study of birds.
Among learning approximately 150 bird species by sight and sound, I’ve learned general internal and external bird anatomy. My most recent project for this course was to prepare a study skin of a European Starling (Sturnus vulgaris).
The European Starling, as you may gather from it’s name, is not from North America.
 |
A flock of starlings take off over garbage at the
Rapp Road Landfill in Albany, NY on January 20, 2011.
Photo credit: Lori Van Buren / Times Union
|
The flocks can blacken the sky.
Each Ornithology student was given a Starling as their specimen to prepare. I suppose preparing the specimen could be considered taxidermy, but I want to make clear that I didn’t mount this Starling in a majestic pose with a snarl on it’s beak :) That’s left for more impressive animals like cougars and monstrous bucks.
Ok, now is when you want to stop reading of you are a little squeamish!
 |
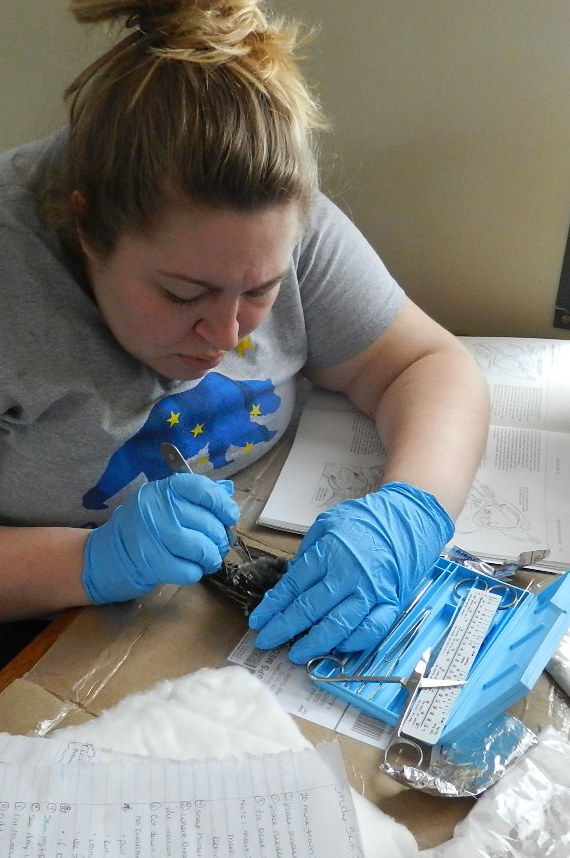
Ready to go: Starling and my dissection kit
|
So basically, what I had to do was remove the entire “innards” of the bird. Not just guts, but the entire inside. It was like unzipping it’s little “bird suit” and removing it’s coat.
Also, do I need to mention that this bird was already dead? I didn’t kill it, it was given to me frozen. A large nuisance flock was captured and gassed with CO2 to kill them. Instead of the birds going to waste, they were given to my college so that students could learn from them.
 |
The first cut.
|
I have a brand new, very sharp dissection kit. I think this is essential when doing any kind of dissection or skinning. Although it seems counter-intuitive that you’d be safer with sharper tools, you’d be less likely to slip, and your cuts will be more accurate.
 |
Severed leg bone from hip joint.
|
The goal was to have what looks like a mini turkey carcass, and a seperated loose starling skin which I would then stuff with cotton to restore the shape of the bird. Everyone knows what a Thanksgiving bird looks like, right? This was the miniature version!
 |
Cotton on the severed ends of the humerus bones of the wing.
|
After severing and cleaning the tissue off both the legs, I worked my way up to the wings. In the picture you can see the cotton I used to replace the muscle mass of the upper wings that I removed. Without it, the wing may look deflated. With too much, I’d have a Popeye bird. Then the tips needed to be tied together so that when the bird was stitched back up, the wings didn't hang too loosely.
 |
Cotton stuffing fills the skull cavity to maintain the shape of the bird's head.
|
I’ll spare the readers of this entry most of the gory details when it came to working on the head. It was disgusting. As I mentioned above, while I was removing the eyeballs (think size, color, shape, and consistency of blueberries- not fresh ones, but maybe frozen then thawed- a little loose in their skin), one POPPED and got onto my face and all up my arm. I had to walk away and take the dog outside for some fresh air.
I recovered, and was able to continue. Once all of the soft tissue was removed from the bird’s skull cavity, I stuffed it with cotton to maintain the shape of the head. I also removed the back half of the skull to have easier access to the “insides”. Also at the base of the skull I made a cut and officially freed the little “turkey carcass”, so now I had a limp Starling skin. Imagine taking the beans out of a Beanie Baby.
 |
A Starling popsicle!
|
I also should mention that while I was working, I used corn meal and Borax to help preserve the specimen. Corn meal works great to soak up any moisture, although there wasn’t much. And the Borax helps to preserve the tissue that is left behind.
Once I got it all out, I had to reform the bird. I used the cotton, and wrapped it around a wooden stick. I had to play with it a bit, but I threaded the stick up through the neck (on the inside of the bird) and lodged the sharpened tip in the nasal cavity. The rest of the stick was wrapped with cotton, and I had to adjust it here or there to make sure the bird didn’t look lumpy.
After a bit of maneuvering, I was satisfied with how the bird looked, and stitched it up! Remember I had made the original incision that was a few inches long. It was recommended that we only needed 3-4 stitches, but I needed more. For my first time though, I think I did pretty well!
 |
When I took this picture, I didn't realize the 'Peanut Gallery' was watching from below!
|
This is my finished bird! You can barely tell that moments before, this bird was excavated and inside out! I think I did a pretty neat job for my first time. I also preened the feathers a bit to make them lay flat and “natural”.
To secure the legs, I crossed them and tied them around the stick and I’m done!
These types of specimens are considered “museum specimens”. They aren’t the ones you’d see in a display case, but each museum, especially a natural history museum, has collections that aren’t on display. Museums are places where things are stored to preserve history and in this case, wildlife species are kept for documentation purposes.
 |
| The identification tag. |
So in hindsight, it was not a HORRIBLE assignment, but I won’t be making a hobby of preserving dead animals either. Unless I’m really bored. I think that taxidermy is an art, and for those who take hunted animals and make them look realistic in dramatic poses- I respect that. I’m turning in my bird tomorrow, and I really hope that I did well. I do NOT want to have to redo this assigment! Once was enough for this girl.
If I was judging it I would say you did very well for your first time, not that I have done that before.
ReplyDeleteA+ :)